Tuesday, 22 February 2011

Finished making the mosaics

I have completed the mosaics today and await installation details.

who is this?


This was drawn by a school boy and it reminded me of when I was a school boy. I used to play with my toy soldiers: Cowboys and Indians, well actually alot of them were General George Armstrong Custer's 7th Cavalry and Indian's. I used to like the Indians best. I really liked their clothes, they seemed so much more interesting and when I played the Battle of Wounded Knee in 1890 the Indians always won.  

I got the same feeling when I saw this drawing as I thought it was not the Knights Templars or King Richard 1st or Crusaders. This I interpreted as a Saracen, a soldier from the middle east in fact, I think it might be even Saladin himself who captured Juruselem and defended it. That same feeling is not to do with religion or belief but a lure of beautiful craft skills, colours, different customs and ways of doing and making things.  In short a kind of emblem for cultural exchange. The armour and battle dress just looks better.
So I have included Saladin as the subject for the stone leaving Strood and venturing out under the motoway to explore the unknown further along the trail towards Cuxton and undiscovered people and places beyond. 
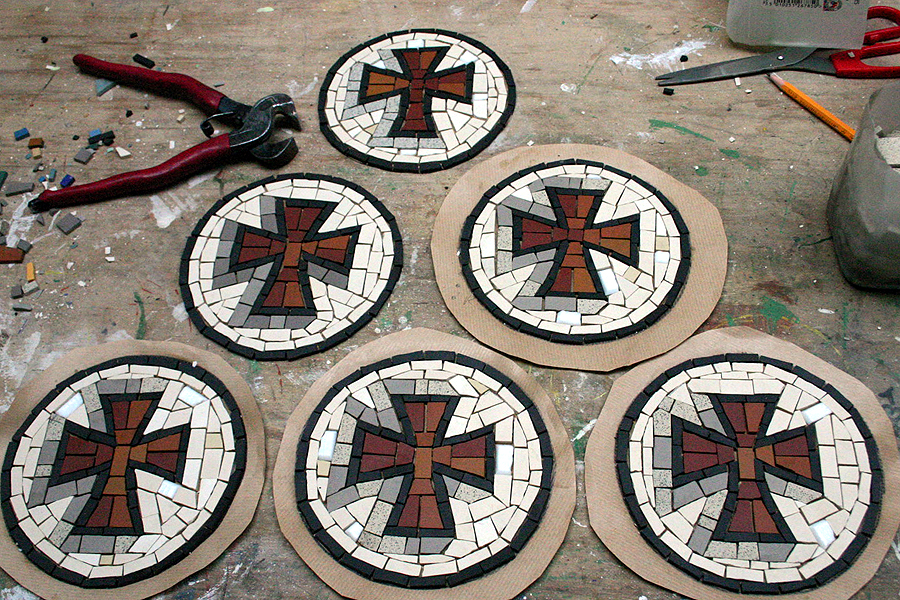
Templar Logos under construction

The logos are also featured on the trail signposts and I will insert them into the tops of the stone posts.
I found this link with a brief historical outline of the Knights Templars.
http://www.middle-ages.org.uk/templar-knights.htm


Monday, 21 February 2011

Almost finished making the main inserts


the last few almost done

I have completed the last three mosaics now. There are the two covered rocks in the background of this photo as well!


There are two spare rocks which, may be one day will get covered with something if I find the time. I liked the faces on the stones and would like to carry on with the idea. But that will have to wait for a rainy day  as I have little time at the moment.


The time for installation is still unclear but I have completed all the main inserts now and only need to make a couple of the small round logos which will go on the top of the stones.


two of the final three designs.
The one on the right will go at the bottom of the new stairs at Rede Common, showing wild flowers, drawn by pupils from the first workshop I did.

The one on the left is actually on of my favourites, it is a map of Strood! Originally drawn by one of the the very young pupils with special needs. He took his map home with him as he was so pleased with it and I needed to take a photo copy to keep a record of it. I remember starting work on it with him and  how hard it seemed to draw a map of Strood:........ impossible on fact. But after a while it was ok and maps don't need to look like ordanace survey maps,  they can record things other than roads and the shapes of buildings.

This map shows living in Strood and home is in the lower right corner. I think this family either have a pet or they can see foxes in their garden (lower left). The blue circle is what I imagine is a pond passed on the way to school and again on the way home. This is my interpretation of the arrows coming out of the pond, my photo copy of his map is black and white so I dont even really know if it is a pond? There is a yellow door which is the entrance to the school and children playing in the school playground.

A very simple map, but one that represent hunderds of young school childrens lives in the Strood area. I put a flower or is the sun in a space just outside Strood. I will talk about the final design in my next post.

Monday, 7 February 2011

Mosaic Progress lll


A Knights Templar

Mosaic construction of the inserts are moving ahead while installation details are sorted out. I have continued with the Historical and Heritage theme for a couple more designs.


A finished Knights Templar (the core theme used on the trail signposts)
and a mosaic depicting heritage buildings and history in the area.

I shall shift the focus away from from history and take a fresh look at the design work the schools have done. Revisit the flowers, maybe the trees or animals seen along the trail. I will also look and see if we have any people or faces. You need a balance of content!

It's funny to think back and I was worried about working and installing these mosaics in freezing temperatures, where my cement would freeze before drying and the mosaics would crumble off as a result of a messed up curing process. Touch wood that particular issue never materialised.  

Friday, 21 January 2011

Mosaic Progress II

There is no news on installation so I have posted photos of the finished mosaics completed so far (still on the paper prior to installation).


Wild flowers

 
Heralic Designs


trail logo

four completed mosaics


Monday, 17 January 2011

Home Made Glue

2 empty jam jars
plain flour (about 6 heaped desert spoons...may be 7 dosent matter, could have eight?)
2 heaped desert spoons of table salt (hard to heap table salt on a spoon)
bring to a gloopy boil (this looks like boiling mud just a creamy colour) simmer for as little or as long as you like and then pour into your empty peanut butter jars.

Sounds easy......the trick is not make your glue lumpy. Mix the salt and flour together dry, than add water that you've already put into the jars, so you know how much glue your making. Add a little water and mix, add a bit more and mix so you make a paste and keep diluting it. If you put all your water in, in one go that's gonna make it lumpy and globules of flour float to the top. Forget that nonsence about sifting flour into boiling water... it's rubbish.

This is a water soluble glue to stick your tiles onto the paper.


Draw your design onto some brown paper. Then take it over to the window and place it flat on the window so you can see through it. Now you will trace the image onto the other side of the paper. This is so your design is now back to front. This back to front version of the design is the one your gonna colour in with mosic tiles. These tiles are stuck onto the brown paper using your home made water soluable glue which in my case was still warm.


This mosaic is from the design of a medieval ship on the River Medway.

completed ship.

So I have several of these to make and have not got photos yet of the ones completed so far, I have also decided that every kerb stone marker needs the little red and white circular logo and that all the backgrouds are green so that they look similar to the new sign posts and are part of the trail. Rather than people think they are just randoms.

Wednesday, 5 January 2011

Previw of the finished rocks.


I have finished the two rocks and I took them outside and photographed then at the end of my road on the grass bank. These rocks will  be fixed in place at Rede Common and Broomhill Park. So I have photographed them amongst wild flowers and grass.


Wild flowers


face of Anne Pratt as young girl.

wild flowers


Anne Pratt the Victorian Botanist 


 So now I will start the mosaics for the marker posts. I will make them on paper and fix them at some later stage. This sticking mosaic onto a paper face is called the reverse technique and enables me to make them without having the actual markers yet.

Mosaic Progress

I have got a few photos of the rocks being covered with tiles. The original circular designs are really acting as a guide only.  Working on a 3D surface like this changes everything, so I decided I want a flower here, here and here, indicate where that was with chalk and join them together with white lines. It is pointless drawing a design on the rock as I cover it over the design with cement.... and can't see where my lines were. So its all pretty free form.

Covering the second stone with flowers.

This was the final session and as you can see...... er....... one of those chalk lines must be in the right place?

When I finished it I then need to grout them. This is to keep the weather out.
Totaly covered the whole thing with black grout.
 The more you put on the more you have to take off!
I'm sure they will clean up fine.

If all goes to plan the majority of the markers will be on these upright kerbs, so I need to modify my designs again to fit into a very narrow, sort of tall but thin shape. Below is a diagram of what these markers will be like. I think the little round cross logo goes on the top of each stone, so this will indentify them as part of the trail (same as the sign posts).